
There how to receive a payment in quickbooks online are a few different ways to receive payments in QuickBooks Online. The most common way is to receive payments from customers is to link your QuickBooks Online account to your bank account and receive payments through bank transfers. You can also receive payments by credit card, PayPal, or check.
1. How to receive a payment in QuickBooks Online
If you’re like most businesses, you probably receive payments from your customers in a variety of ways. Perhaps some customers pay by check, while others use credit cards or bank transfers. QuickBooks Online makes it easy to track and manage all your customer payments in one place.
To receive a payment in QuickBooks Online, follow these steps:
1. Go to the Sales menu and select Customers.
2. Find the customer you want to receive payment from and click on their name.
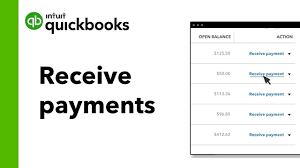
3. Click the Receive Payment button.
4. Enter the amount of the payment and choose the payment method.
5. If you want to apply the payment to a specific invoice, select it from the list. Otherwise, QuickBooks will apply the payment to the customer’s oldest outstanding invoices.
6. Click Save and Close.
That’s all there is to it! QuickBooks Online will automatically record the payment and apply it to the appropriate invoices. You can always view a customer’s payment history by going to their profile and clicking the Payments tab.
2. The benefits of using QuickBooks Online to receive payments
QuickBooks Online is a great way to receive payments from customers. Here are a few benefits of using QuickBooks Online to receive payments:
1. QuickBooks Online is extremely user-friendly and easy to use. You can easily set up recurring payments so that you can receive payments on a regular basis without having to manually enter each payment.
2. QuickBooks Online integrates seamlessly with your bank account. This means that you can easily track your payments and see which payments have cleared and which have not.
3. QuickBooks Online offers a variety of payment options so that you can choose the one that best suits your business. You can accept credit card payments, ACH payments, or even PayPal payments.
4. QuickBooks Online offers great security features to protect your payments. All of your payment information is encrypted and stored securely.
5. QuickBooks Online offers excellent customer support. If you have any questions or problems, you can easily contact customer support and they will help you resolve the issue.
3. How to set up QuickBooks Online to receive payments
QuickBooks Online (QBO) is a great way to manage your finances and receive payments from customers. Setting up QBO to receive payments is easy and only takes a few minutes. Here’s how:
1. Log into your QBO account and go to the ‘Settings’ tab.
2. Under the ‘Payments’ section, click on the ‘Payment Methods’ tab.
3. Click ‘Add Payment Method’.
4. Select the payment method you would like to use. QBO offers several different payment methods, including credit cards, debit cards, and ACH (bank) transfers.
5. Enter the required information for the payment method you selected.
6. Click ‘Save’.
That’s it! You’re now ready to receive payments through QuickBooks Online.
4. How to receive payments in QuickBooks Online
Are you using QuickBooks Online to manage your finances? If so, you may be wondering how to receive payments through QuickBooks Online. In this article, we’ll show you how to do just that.
Receiving payments in QuickBooks Online is simple. Just follow these steps:
1. Log in to your QuickBooks Online account.
2. Click the “+” sign at the top of the page, then select “Receive Payment.”
3. Select the customer who is making the payment.
4. Enter the amount of the payment.
5. Select the account that you want the payment to be deposited into.
6. Click “Save and Close.”
That’s all there is to it! Now you know how to receive payments in QuickBooks Online.
5. How to reconcile payments in QuickBooks Online
“5 How to reconcile payments in QuickBooks Online”
Are you using QuickBooks Online (QBO) to manage your business finances? If so, you may need to reconcile your payments from time to time. reconciling payments helps to ensure that all of your transactions are accounted for and that your books are in order.
The process of reconciling payments in QBO is relatively simple. In this article, we’ll give you a step-by-step guide on how to do it.
Step 1: Go to the Gear Icon and Select “Reconcile”
The first thing you’ll need to do is go to the gear icon in the upper right-hand corner of your screen and select “Reconcile” from the drop-down menu.
Step 2: Select the Account you want to Reconcile
Next, you’ll need to select the account that you want to reconcile. This is typically your bank account or credit card account.
Step 3: Enter the Statement Ending Date
Now you’ll need to enter the statement ending date. This is the date that is printed on your bank statement.
Step 4: Enter the Opening Balance
The opening balance is the balance that is on your bank statement on the statement ending date.
Step 5: Enter the Total Deposits
Total deposits is the sum of all of the deposits that you have made into the account since the last statement.
Step 6: Enter the Total Withdrawals
Total withdrawals is the sum of all of the withdrawals that you have made from the account since the last statement.
Step 7: Enter the Ending Balance
The ending balance is the balance that is on your bank statement after you have made all of your deposits and withdrawals.
Step 8: Review your Reconciliation
Once you have entered all of the information, you’ll need to review your reconciliation to make sure everything is correct.
If everything looks good, you can click the “Finish” button.
And that’s it! You’ve successfully reconciled your payments in QuickBooks Online.

![[silent war] taming a tsundere](https://newsipedia.com/wp-content/uploads/2024/04/download-20-1.jpeg)